So as promised (I know…you couldn’t sleep last night, could you?), here’s the tutorial for the mason jar mugs I showed ya in yesterday’s post.
.jpg?resize=426%2C640&ssl=1&quality=100&f=auto)
Remember when I confessed that I’m not “crafty?” Yeah…still not. You can literally not have one single “craft bone” in your body and still complete this little project. So super easy.
Here was my inspiration: I saw a tablescape created by Holly Mathis where she used these goblets.
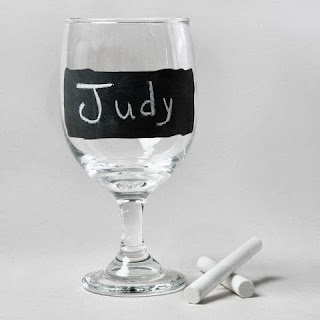
And I thought they were really cute. I also thought, I can totally do that. So thus started my search for goblets. I wanted them chunkier (i.e. not wine glass-type) and they had to be cheap. Then…I thought,
I really don’t want anything too precious but rather something more rustic-looking.
Then into my head popped this guy.
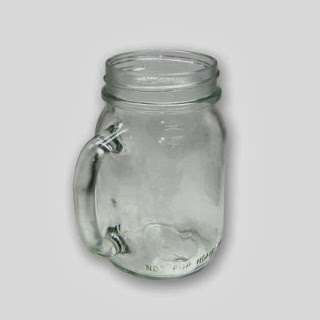
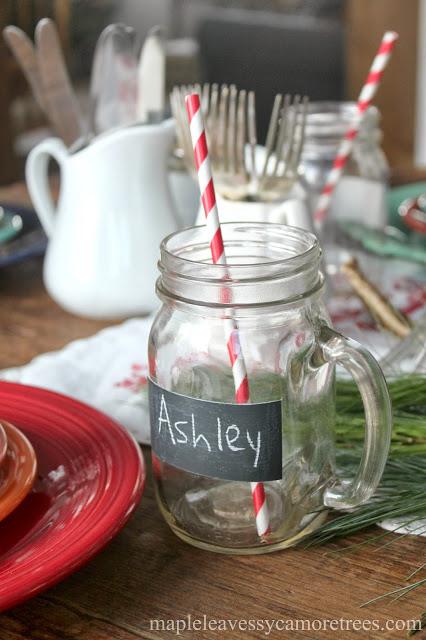
Perfect. Rustic, not fancy-schmancy, and they’d be really fun to paint with chalkboard paint. Locals, I got mine at Good’s Store but for all you non-locals, you can buy them from Amazon. Mine were only $1.29. So for under $15, I got rustic, unique, and AWESOME-looking glasses for my Christmas spread. SCORE!! I bought 10 (but will probably go back and pick up a few more.) (Just FYI, these glasses are only for cold drinks. You’re not supposed to put hot liquid in them.)
Now when I researched “painting glasses with chalkboard paint” via Pinterest, I saw a million versions of the original goblet I was going to do (a lot of them having the foot painted), but none for the Ball jar mugs. Score! I love not beating a dead horse with the same exact craft project, ya know what I mean? So as far as I’ve seen, NO ONE has done these Ball jar mugs yet! (You saw it here first, peeps. Ha!)
This is what you need: primer, chalkboard paint, masking (painters) tape, and a brush. (Or you can use the spray chalkboard paint…this is just what I had on hand.)
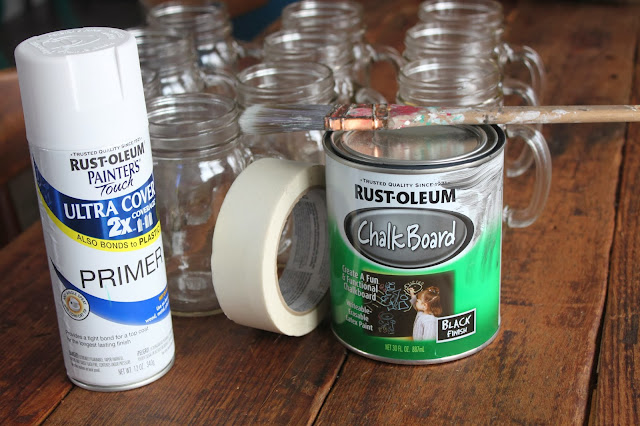
Tape out the area you want to paint. I eyeballed it. It helped that I had wide masking tape. (1 1/2″)
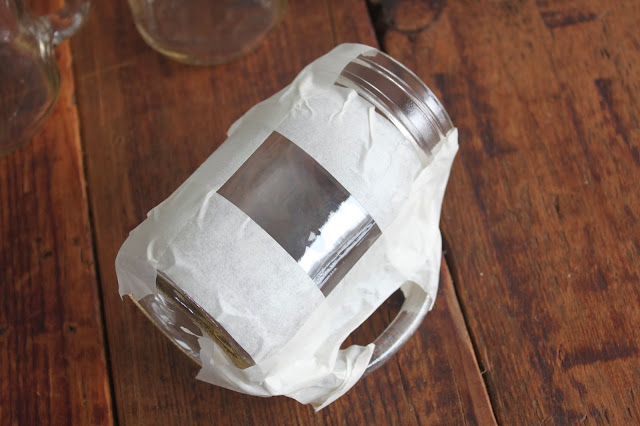
Spray with primer (I definitely didn’t want to skip this part, otherwise there’s a good chance your chalkboard paint will literally just peel off.)

Paint with chalkboard paint. I read somewhere that you’re supposed to go in one direction the first time, then other directions the next two times. So that’s what I did.
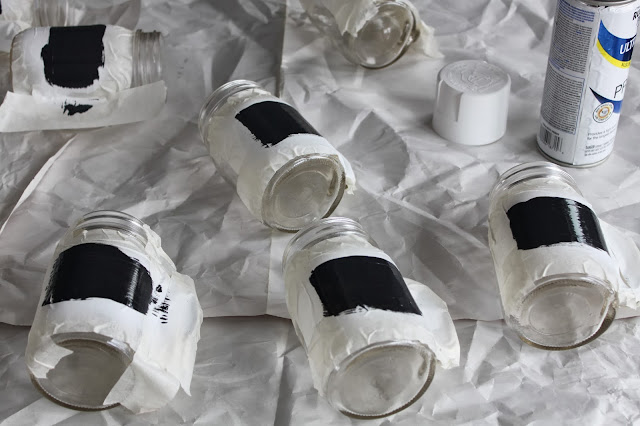
Mitch peeled the tape off while it was a little tacky. I was making dinner. And taking this picture, obviously. 🙂 Any residue that was left behind after the tape was removed, I just chipped off with my nail. You can also use a razor blade.
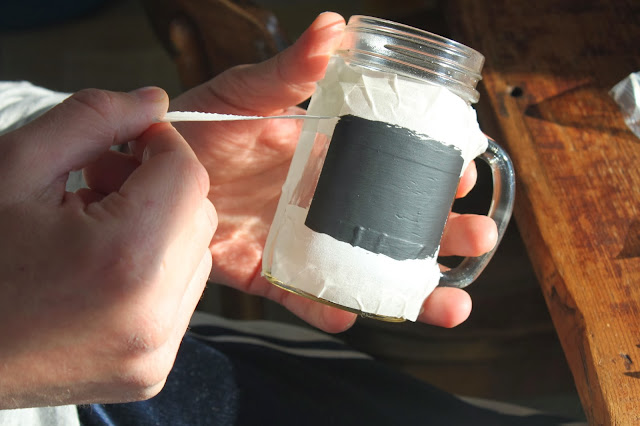
I waited a day then seasoned my chalkboard surface by rubbing lightly with a piece of chalk. I think they turned out marvelously!
.jpg?resize=640%2C426&ssl=1&quality=100&f=auto)
Now there’s no mistaking whose glass is whose. Love it. Seriously, aren’t they just so cute?!
.jpg?resize=426%2C640&ssl=1&quality=100&f=auto)
Yeah, just call me “Krafty Kat.”
Ha!


