
Have you ever had one of those projects that you have been planning for years? You have all the supplies and have thought it all out but the only thing missing is time and motivation. Well we probably have a ton of them but one in particular was the barnwood table that we just finished for our dining room. Seriously, I think this may have been one of the first things we planned to do when we started our renovation almost 4 years ago. My brother had inspired me when he built his own table out of barnwood several years ago. I decided that if he could do it, then I could too. He even had several old barn boards lying around that he gave to me. So anyway, the boards sat in our basement until a few weeks ago when Kat was away and the kids were in bed early. I needed something to do (probably because I was out of lives on Candy Crush) so I finally decided to start tackling this overdue project.
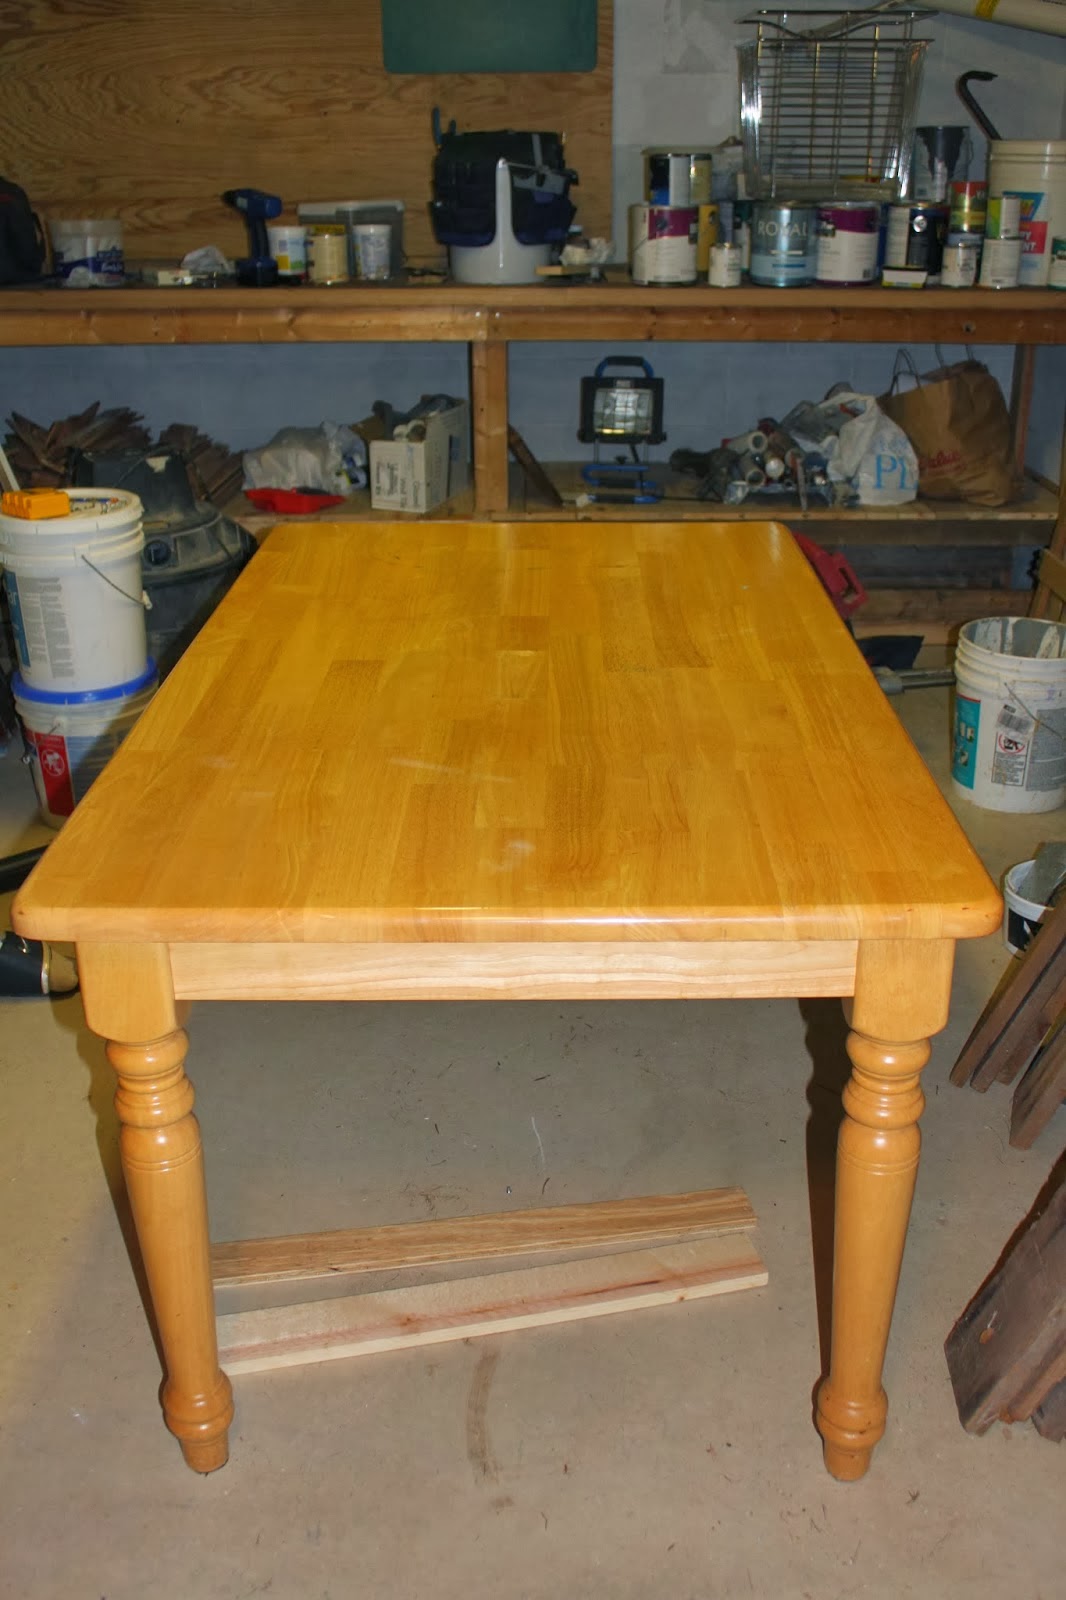
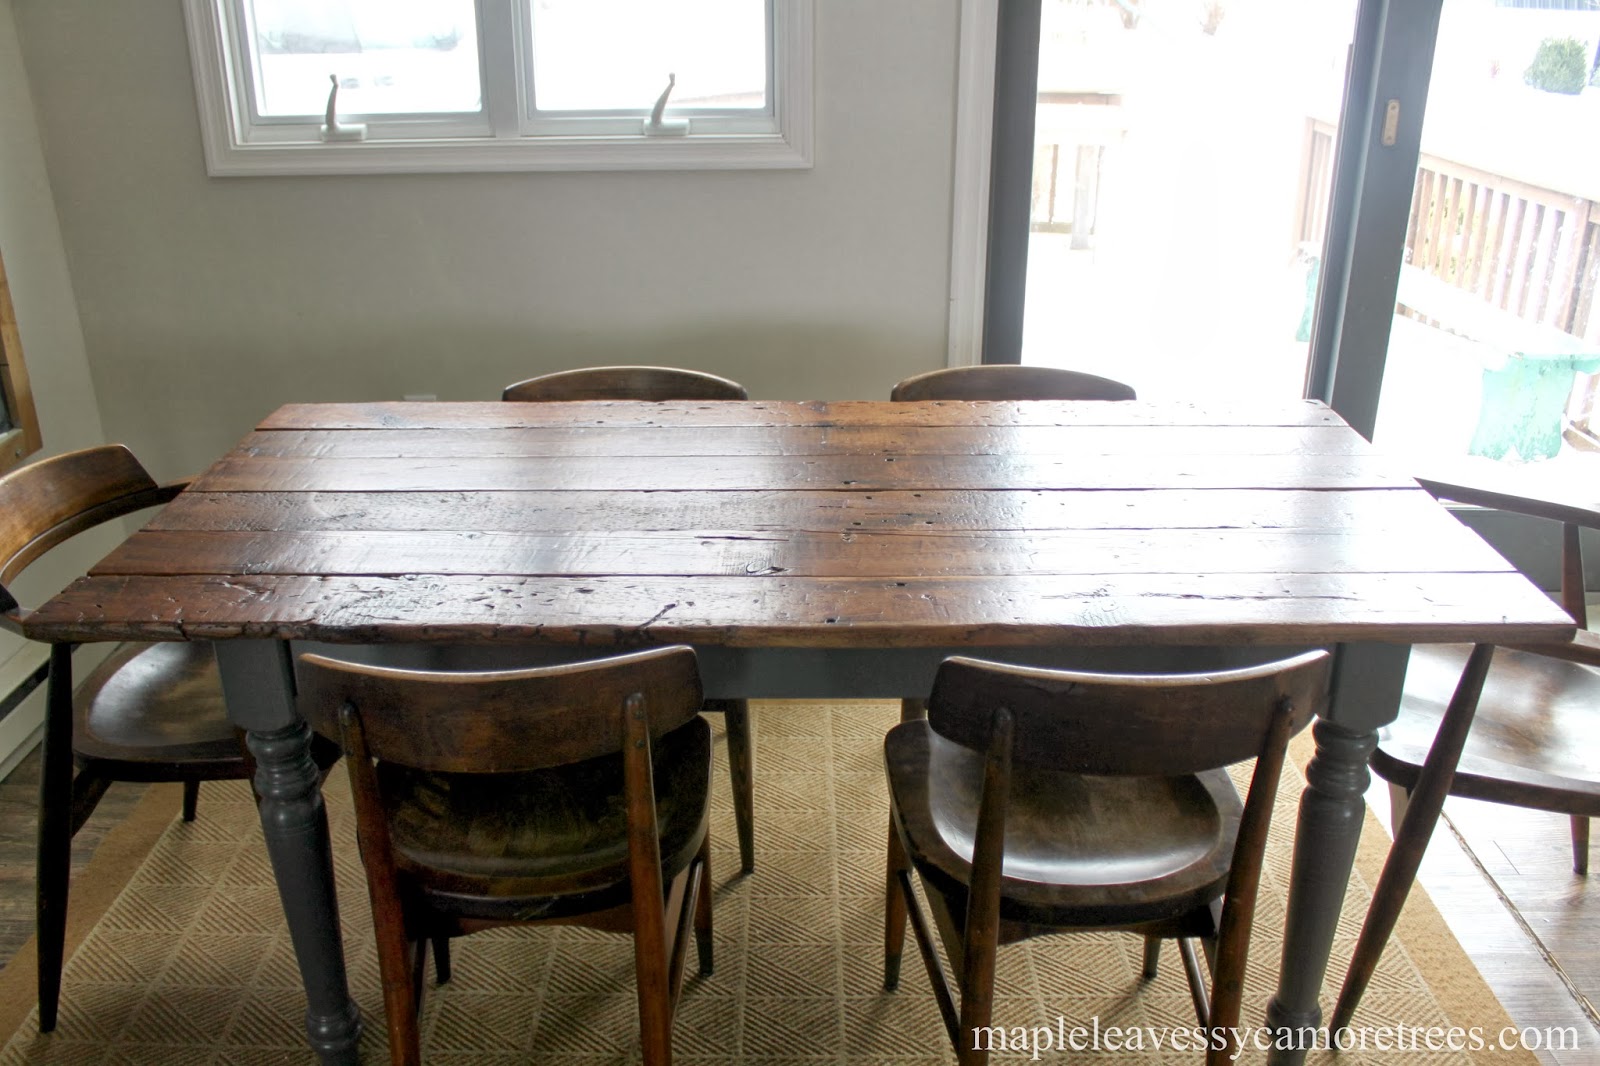
Previously, we had bought this wooden table or at least reserved it from my parents’ barn (they have a barn where they sell all kinds of crap they find or people give them to sell) probably like 3 years ago. It served as our current dining room table for quite a while now. We liked the solid legs and thought the base would look great with a barnwood top. It was much easier than trying to build my own base. So off the top went.
The top was secured to the base with 14 long screws screwed through the bottom of the apron. The top was a solid piece of wood and heavier than I thought it would be.
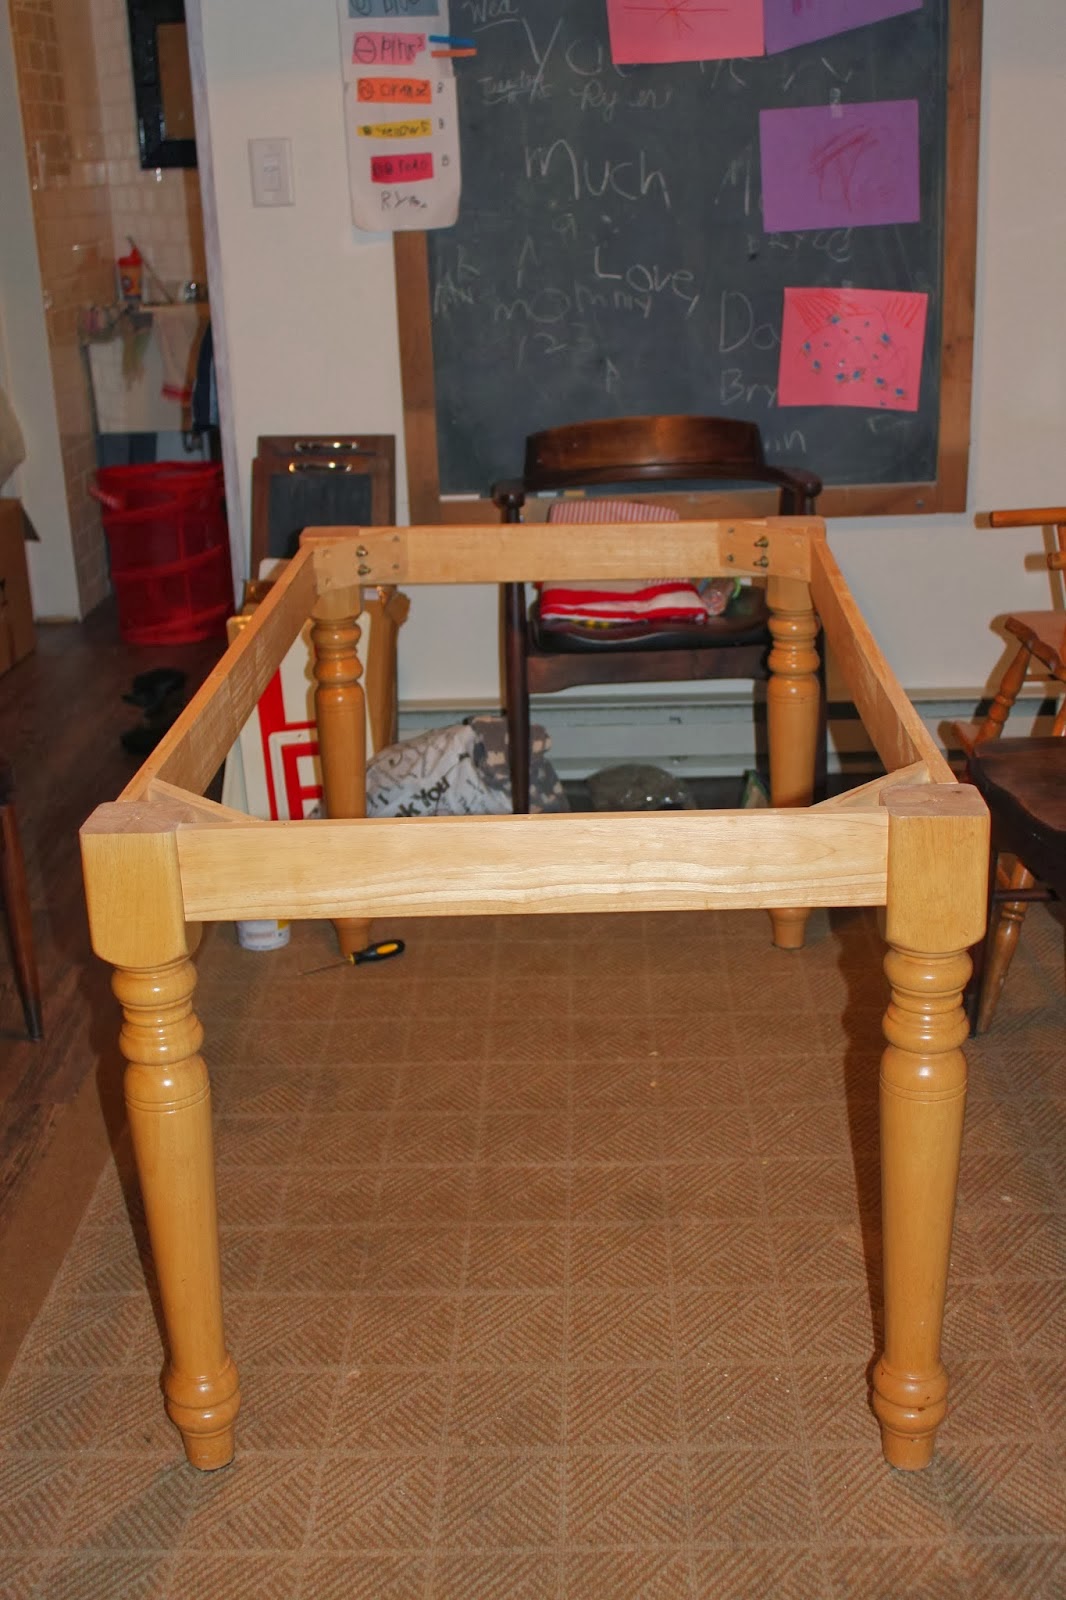
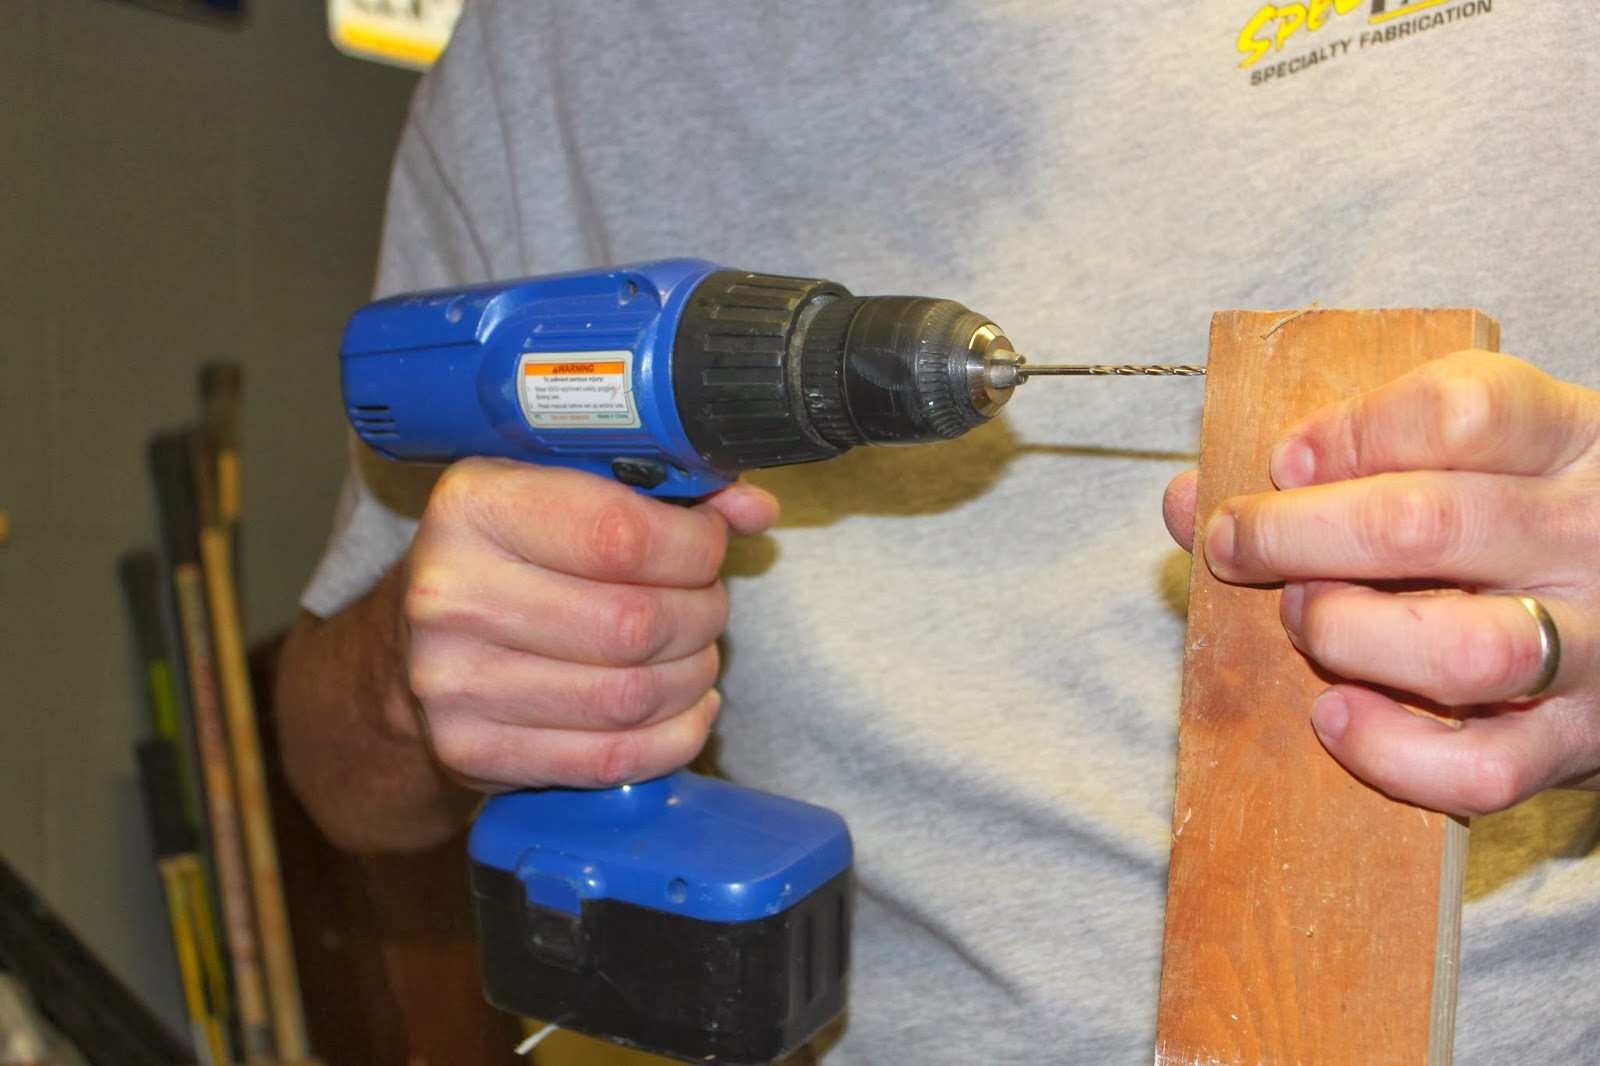
Since the new top was gonna be individual boards, I had to add some 1×4’s to the inside of the base where I could easily screw through the bottom. This way no screws would have to be seen.
I just used some old scraps that I had lying around.
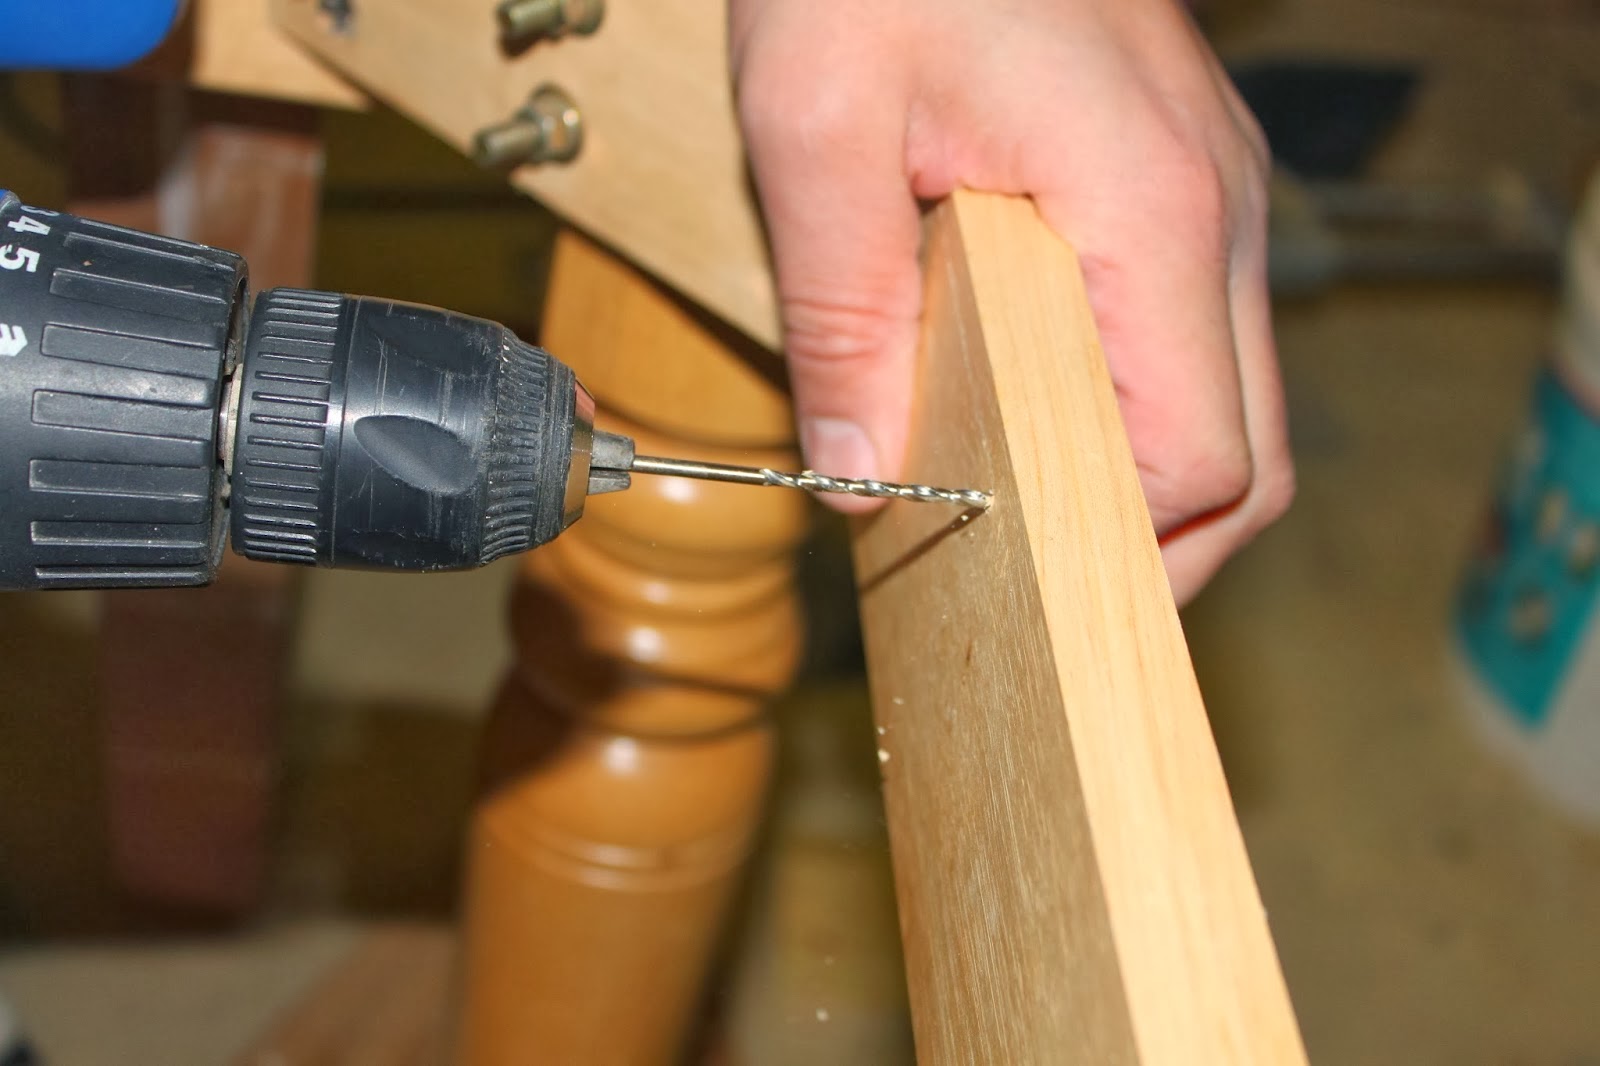
Pre-drilled some holes to the inside of the apron and the 1×4’s
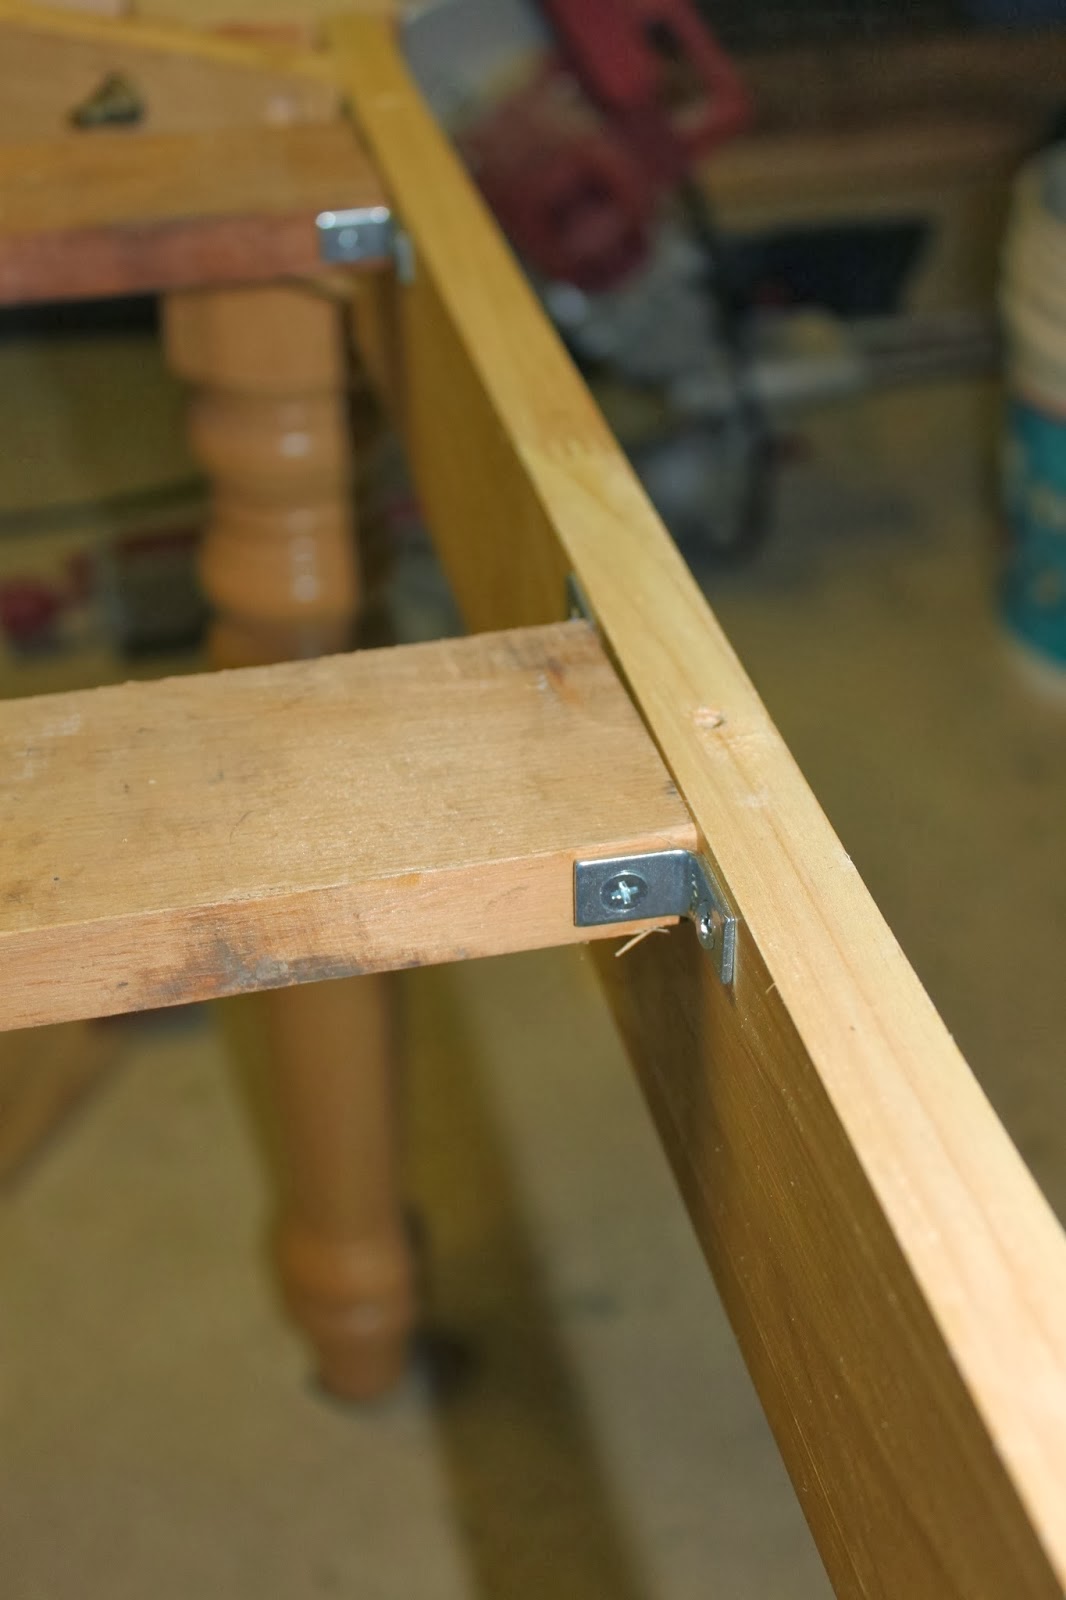
And secured four of these boards using these small elbow brackets making them flush with the top of the aprons.
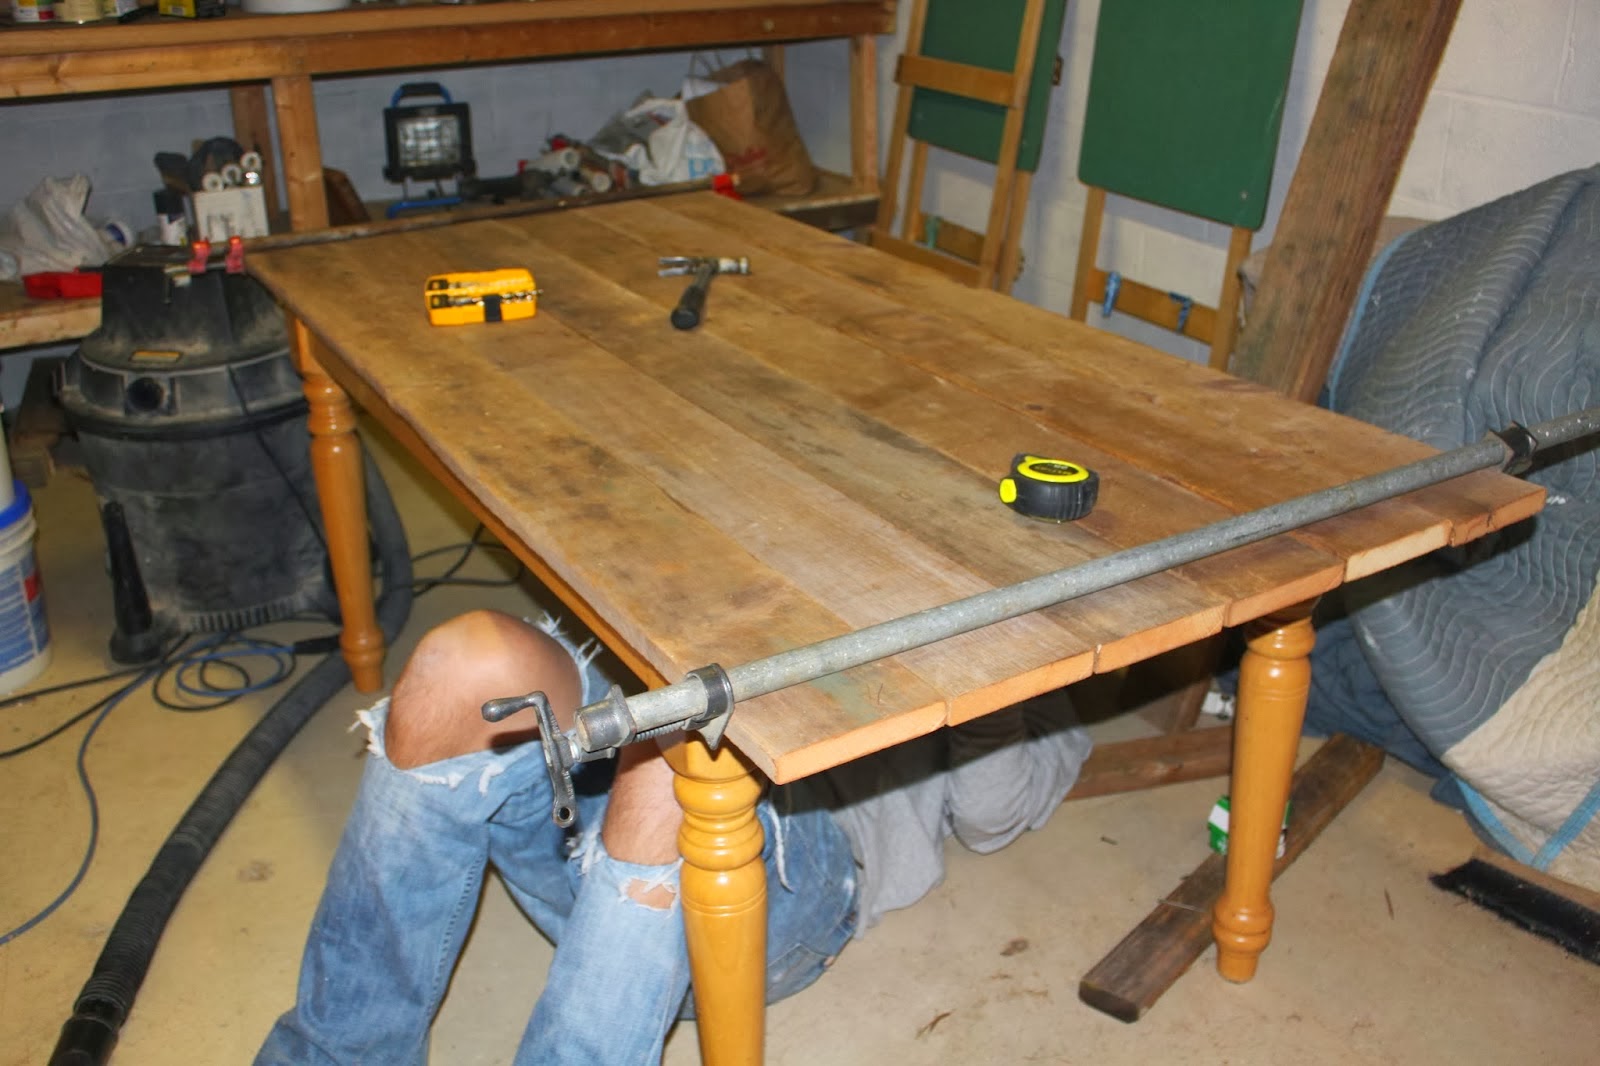
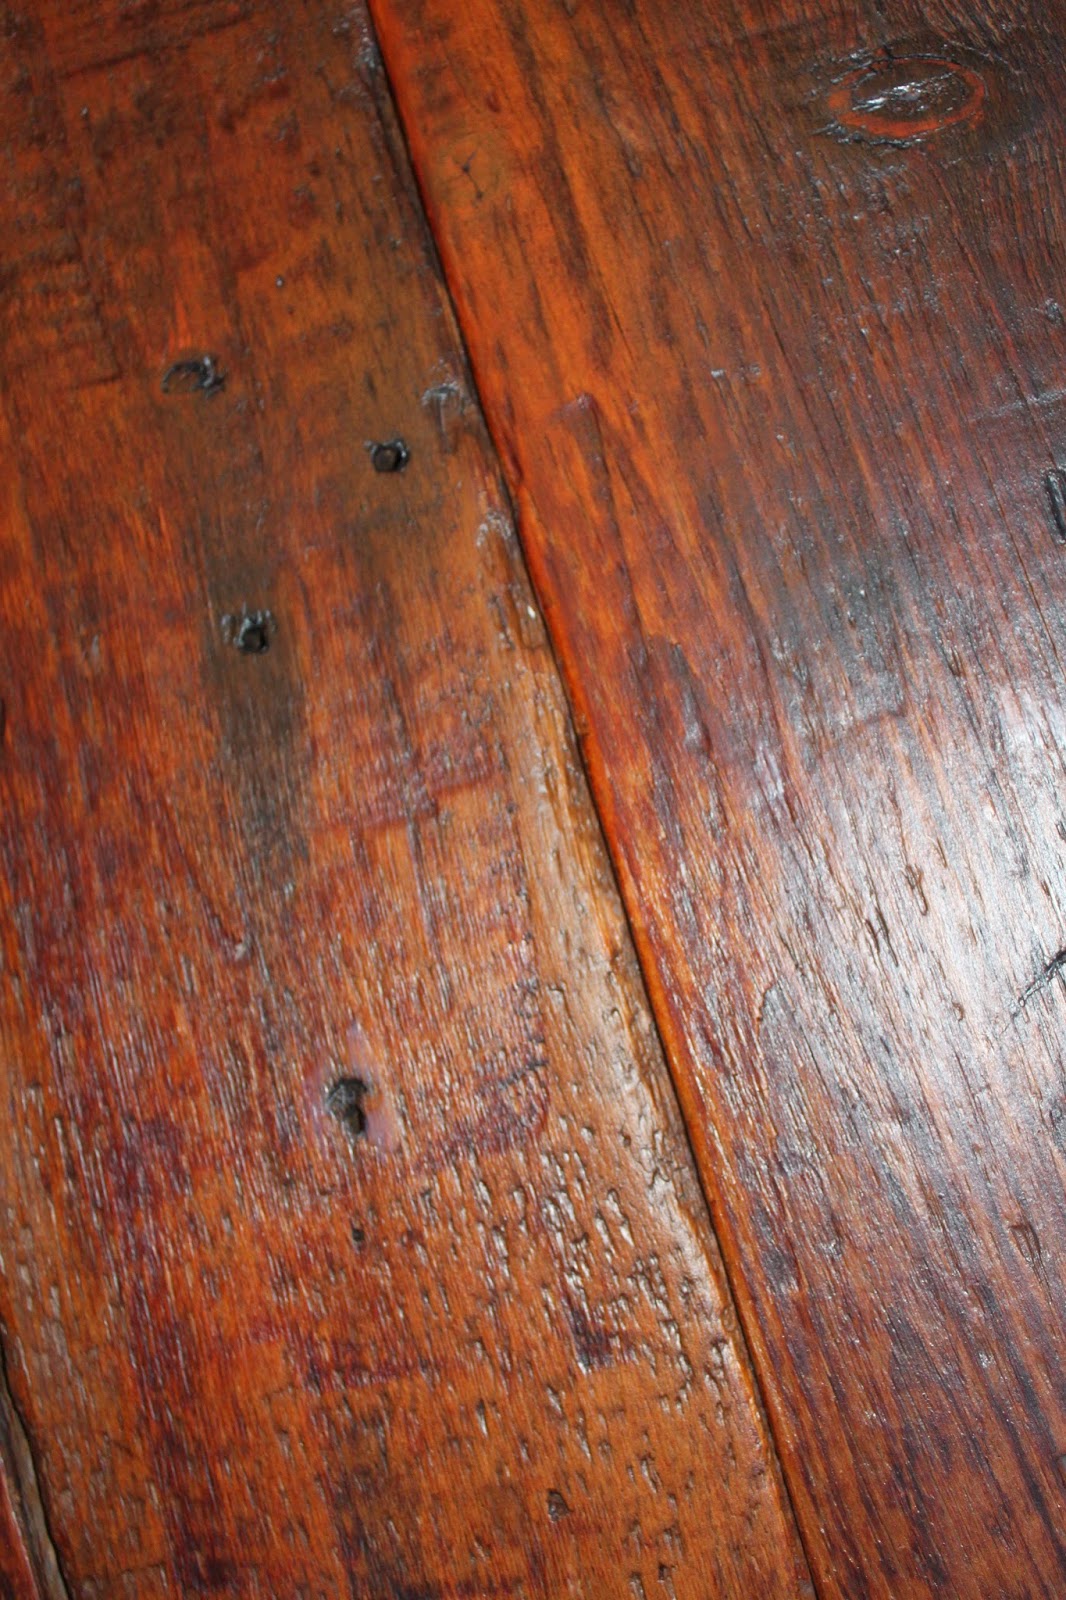
Next I laid 6 of the barn boards on top and mixed them around until I found the best fit. The boards were obviously not perfect and there are some slight gaps in between them at places but we figured that was all part of the rustic look.
My lovely assistant helped me get the best layout before I cut each board to about 6 feet. which was a foot longer then the previous table top.
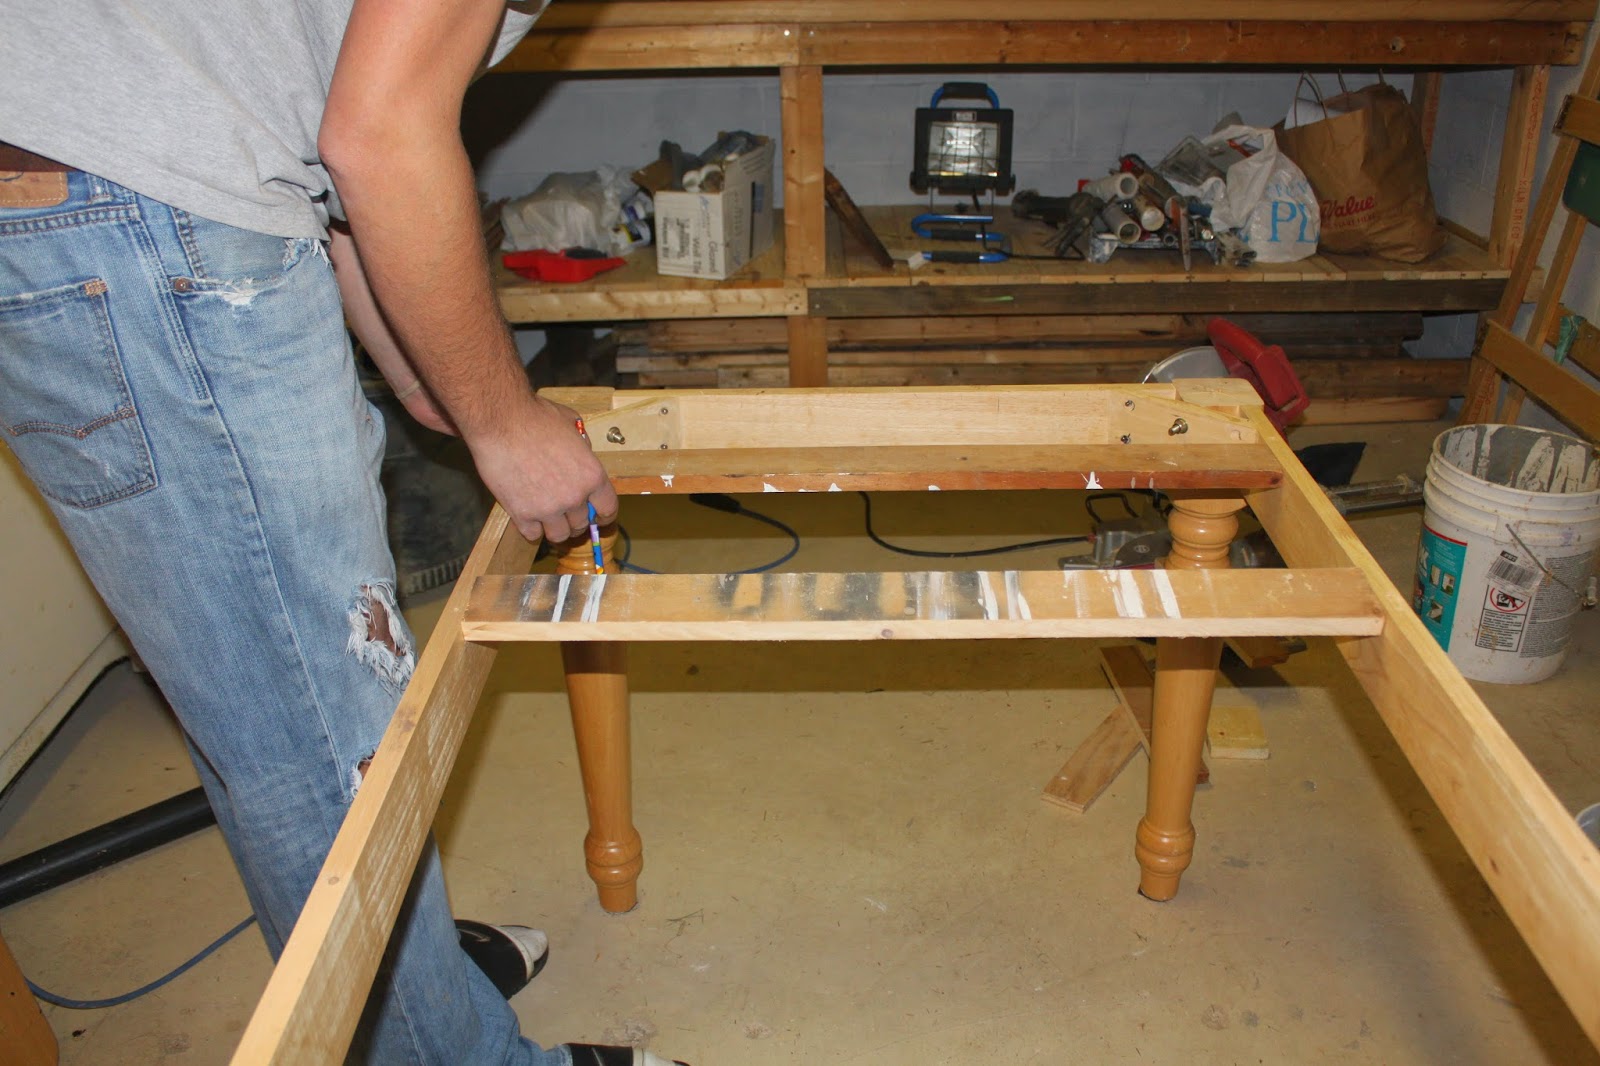
Then I got two long clamps and clamped all the boards together so they wouldn’t move. I measured so it was even on all sides and was now ready to screw the top in place.
I put several screws through the 1×4’s that I added and through the apron where the original top was secured into the barn boards.
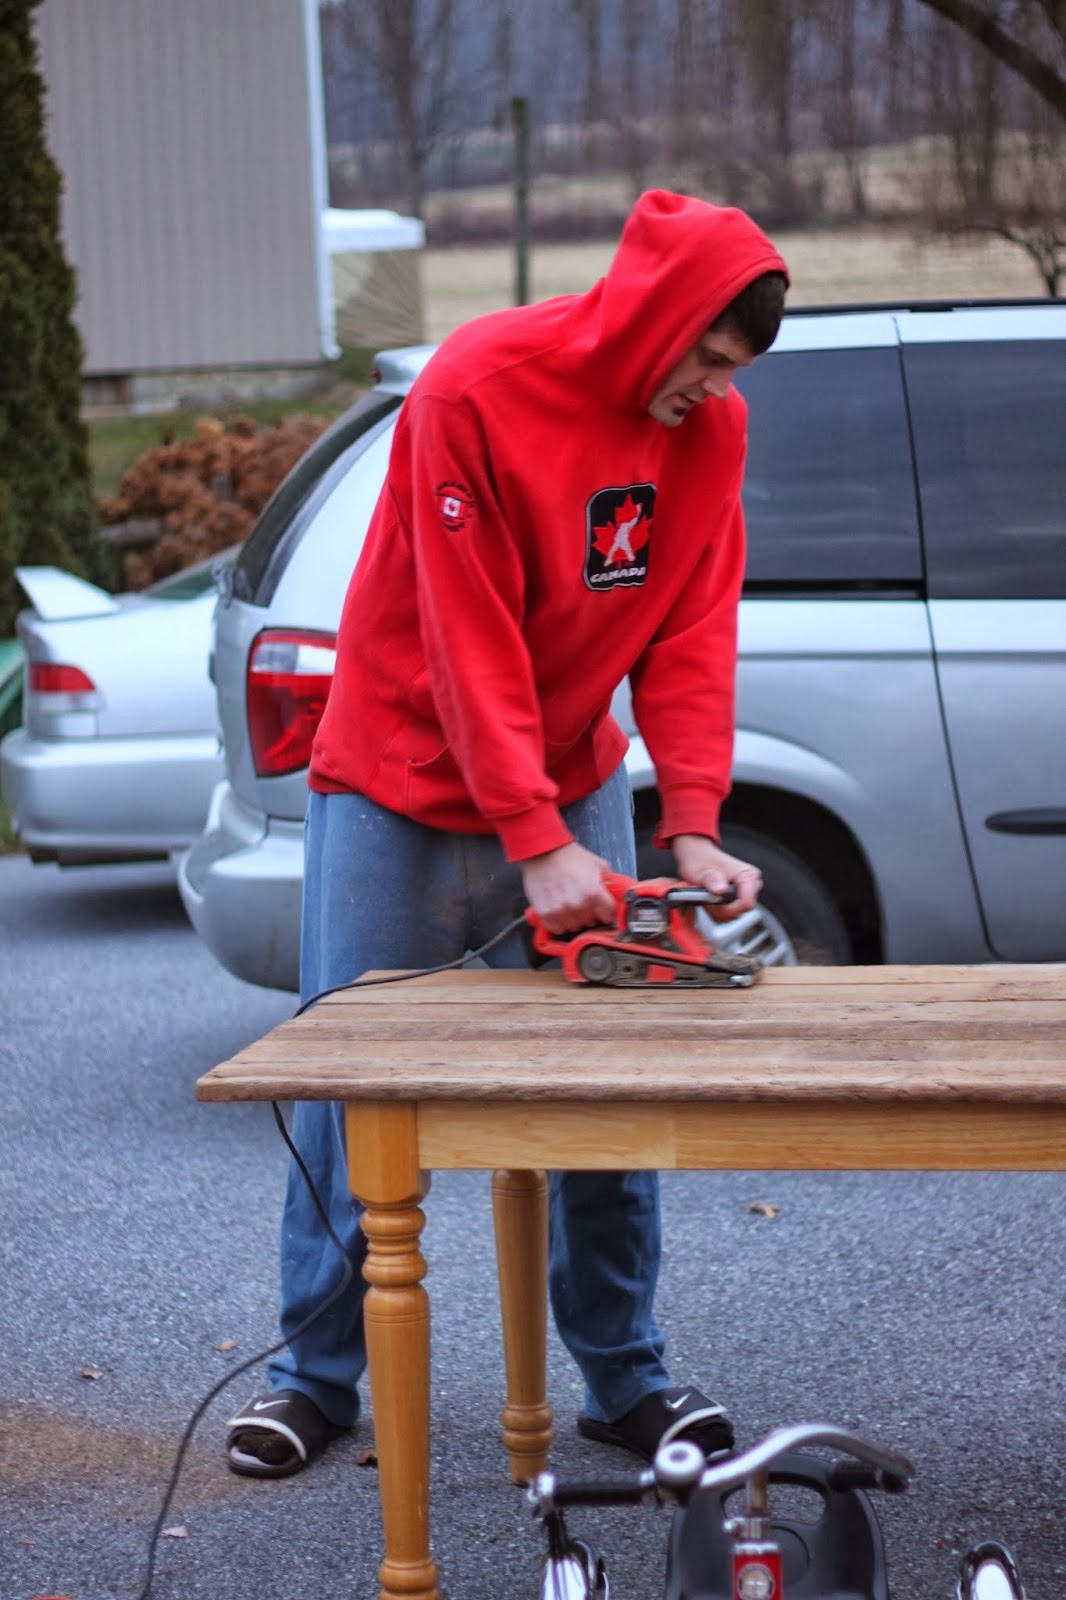
The top was now solid and secure and was ready to be sanded. I sanded it well with a belt sander as it was pretty rough and then by hand with a finer grit sandpaper.
Oh yea, sweatpants baby!
Not sure what Bryce is doing here.
Oh, I guess he was trying to blow away the dust.
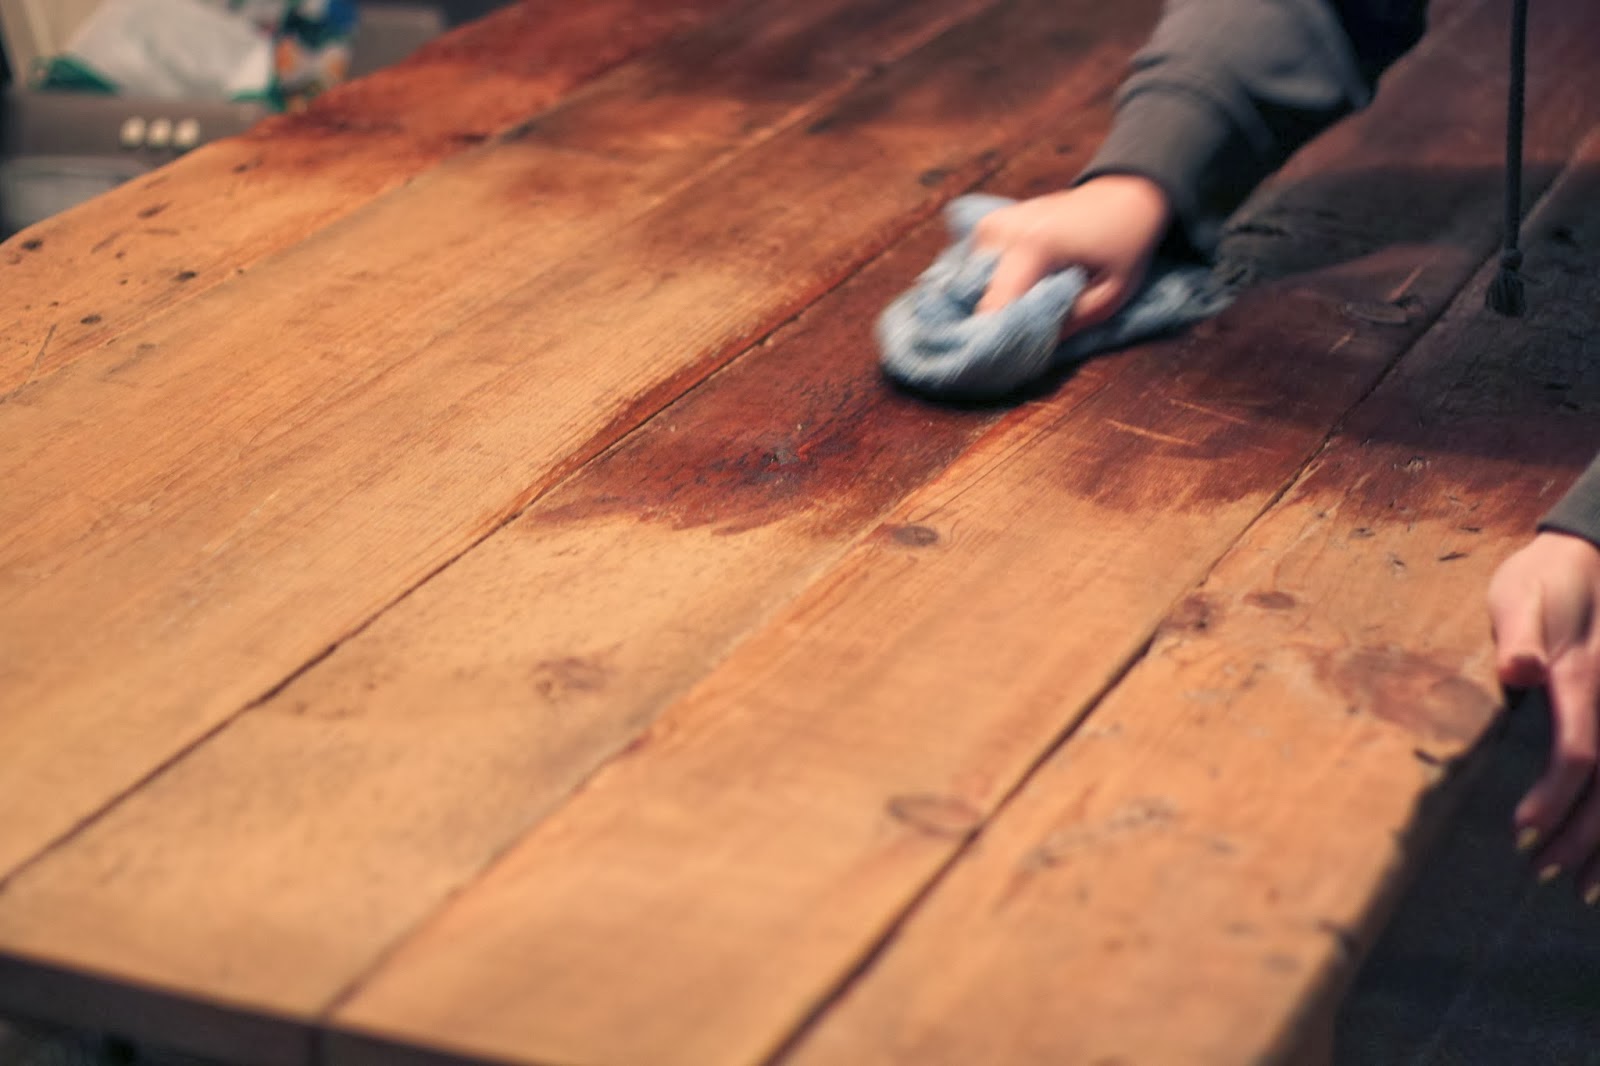
After a really good sanding, we brought the table inside and Kat put several coats of mineral oil on the wood. Mineral oil works great for conditioning old wood and gives it a nice rich, dark color. This served as our “stain.”
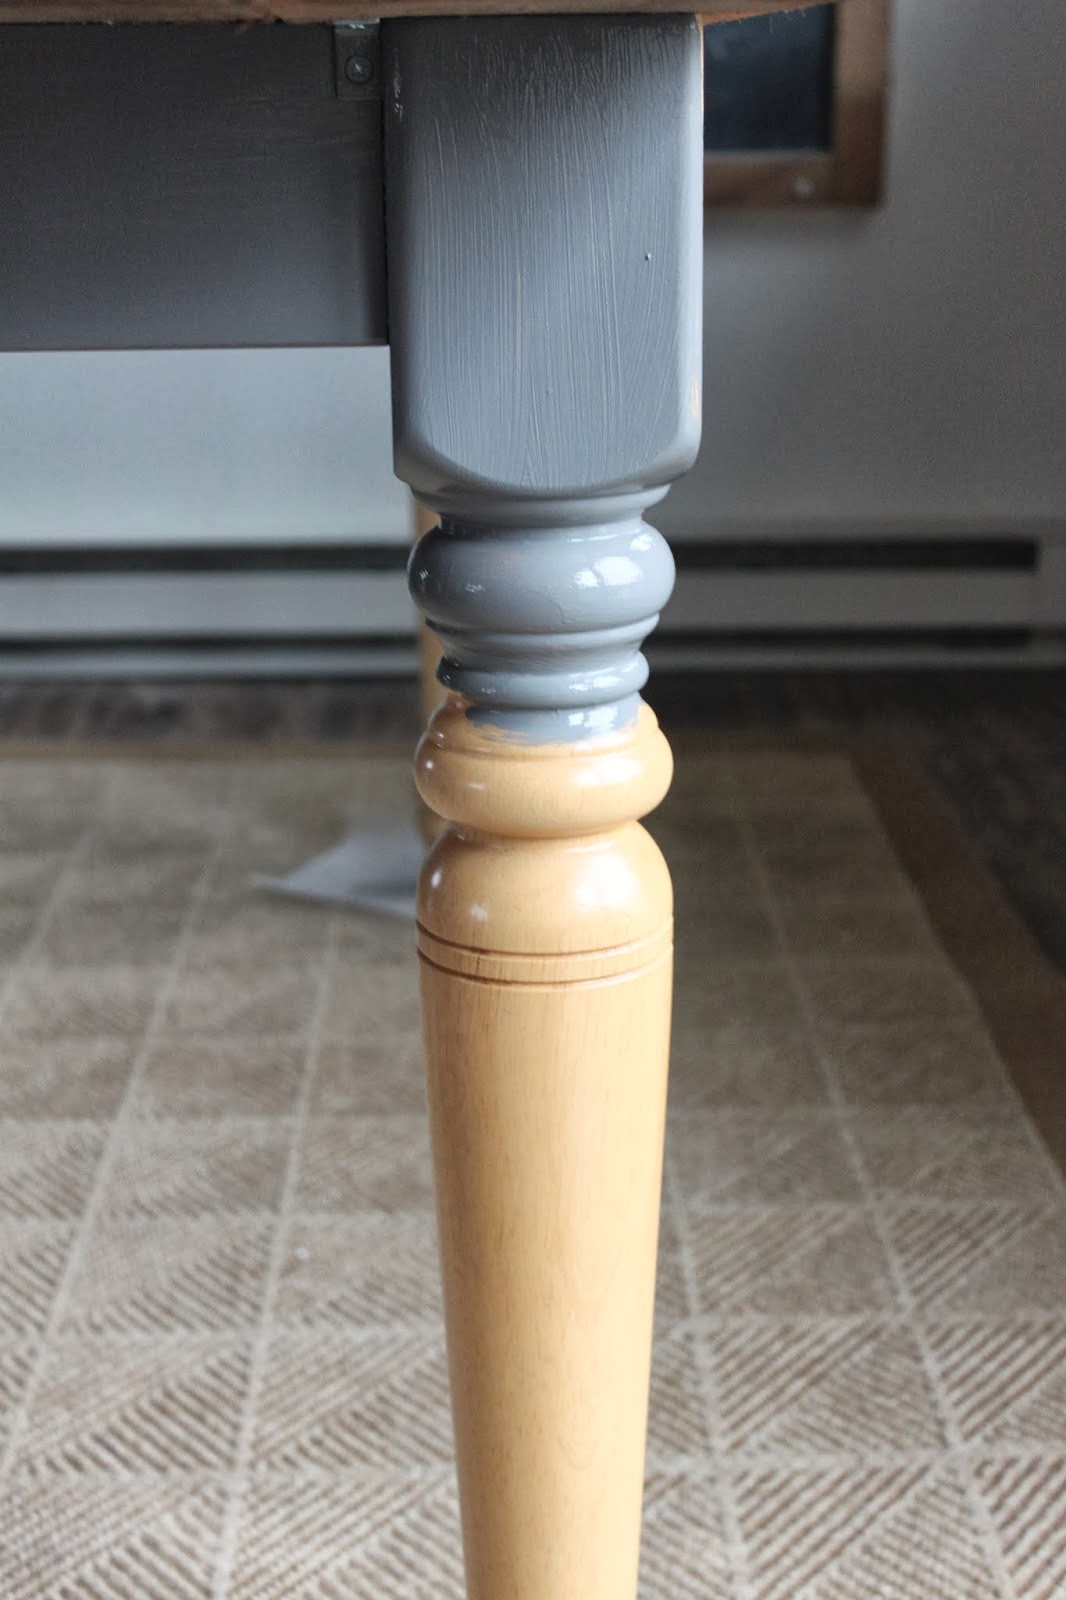
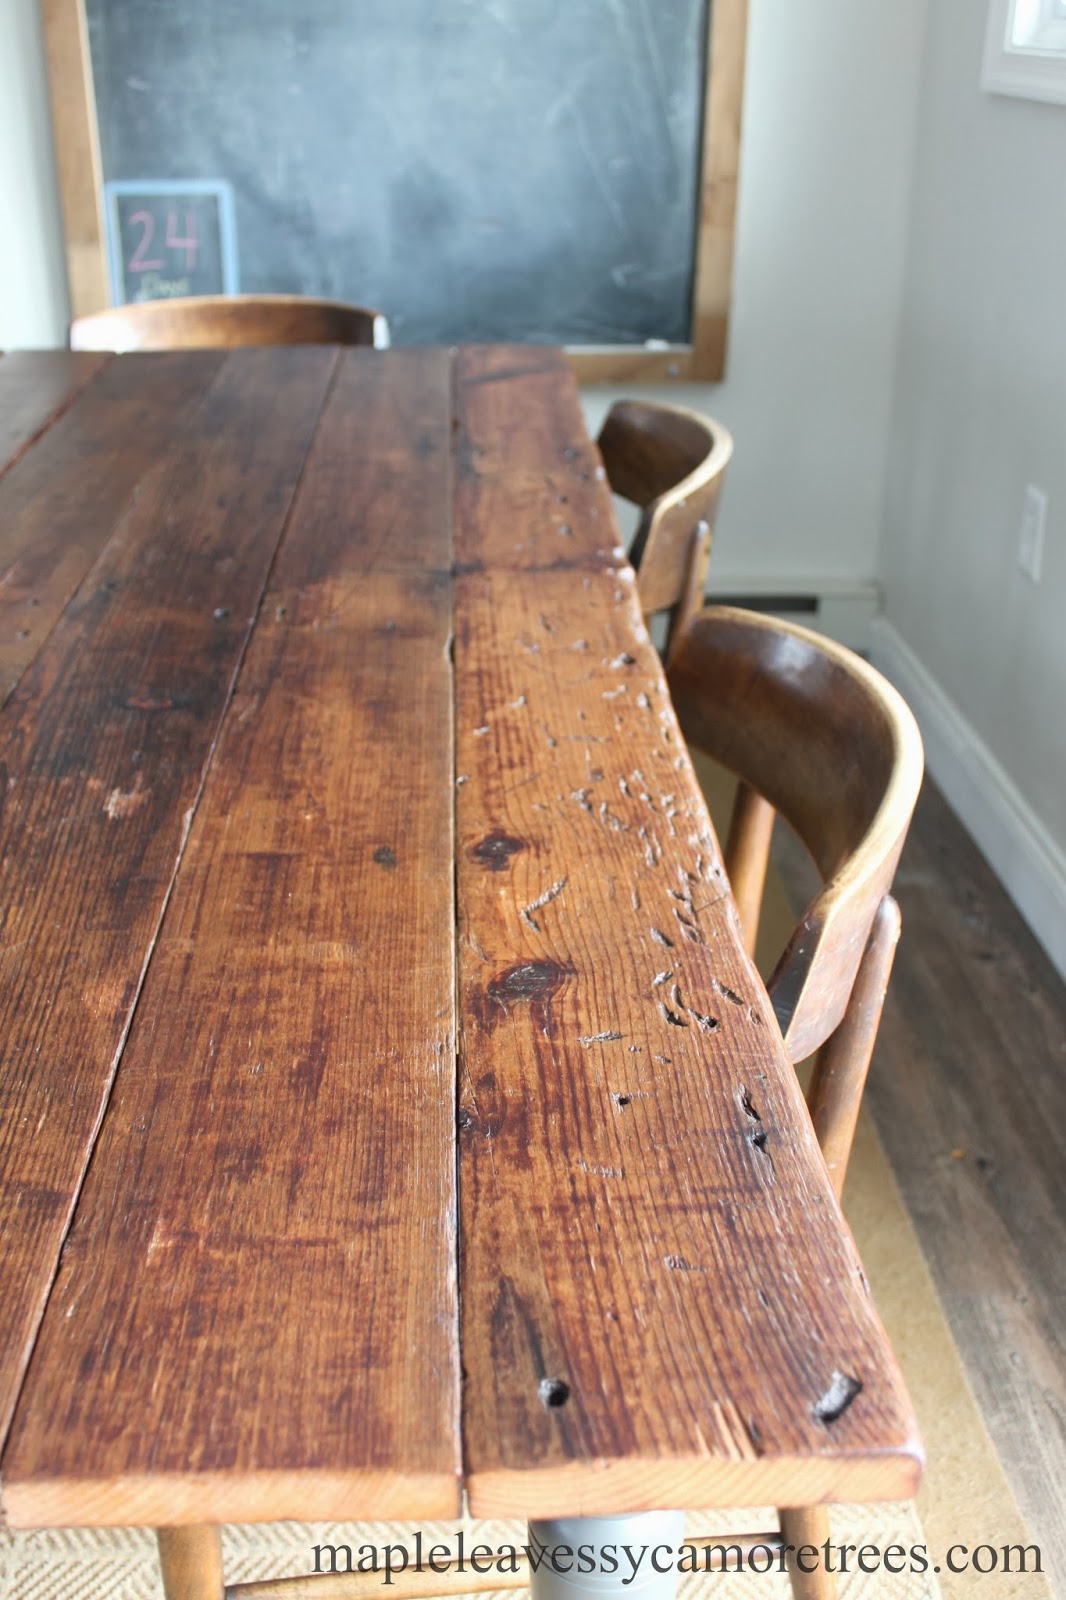
She then painted the base this grey color (Benjamin Moore Kendall Charcoal). Note: she didnt bother to prime it since she was going to protect it later with poly.
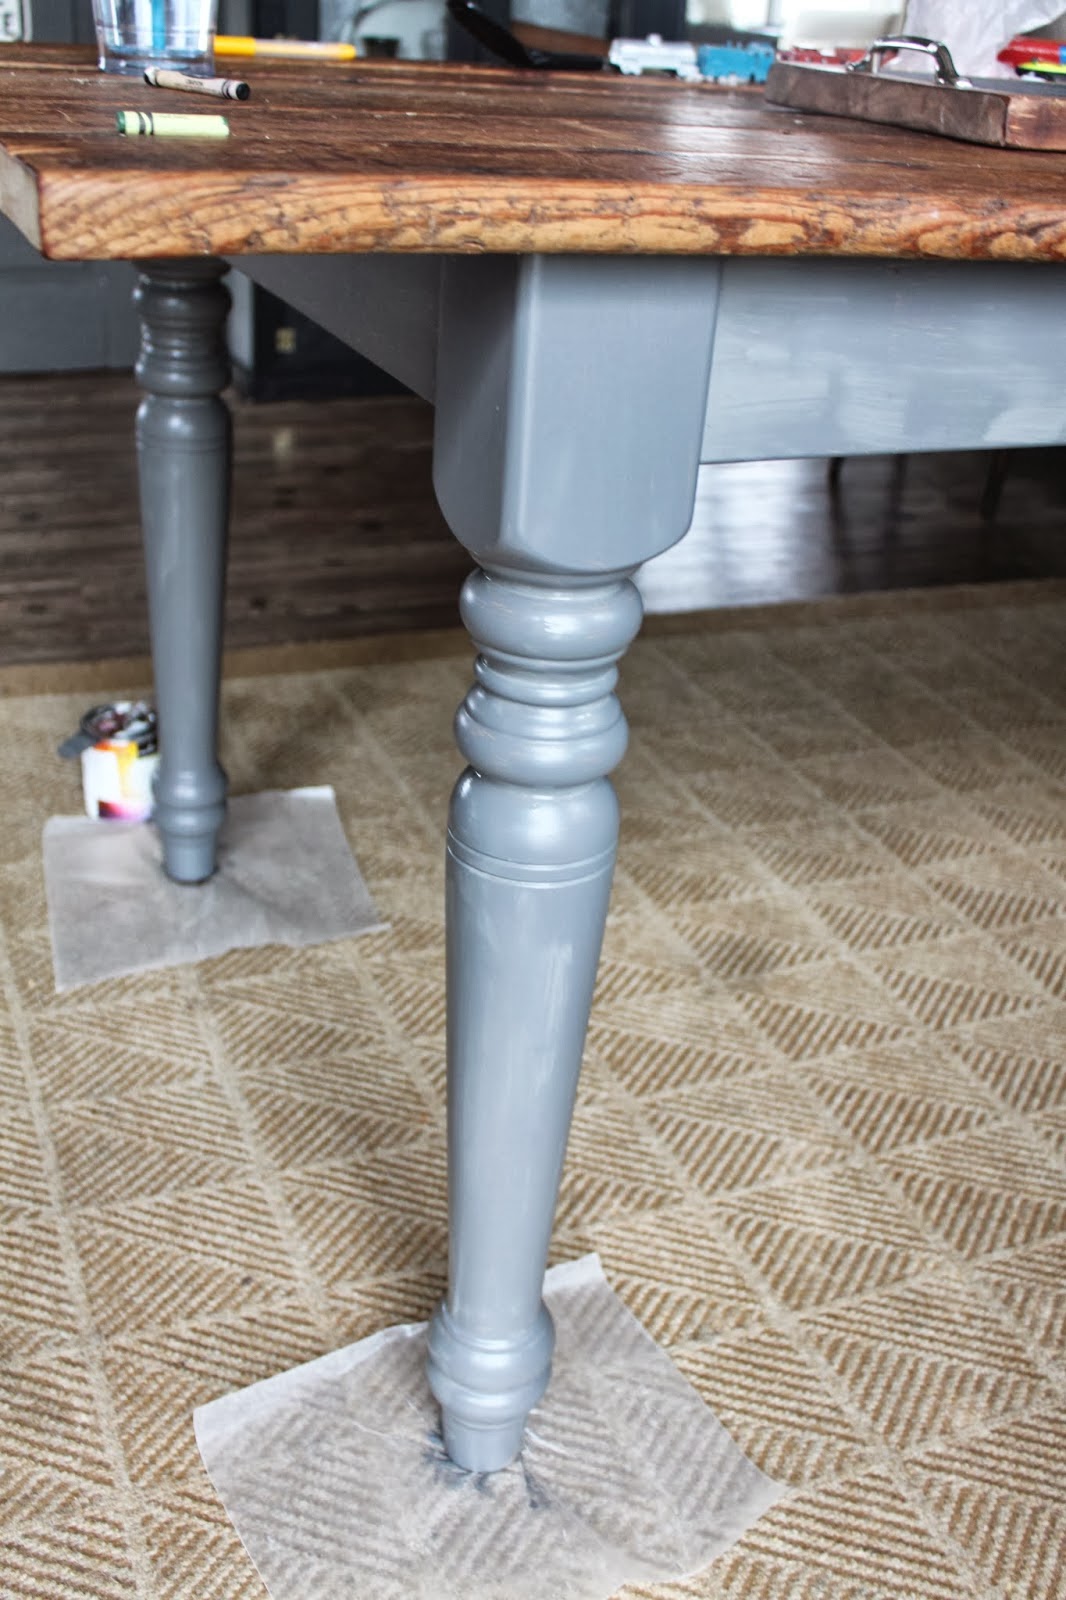
And finally put a few coats of wipe-on poly on the base and wood finisher on the top.
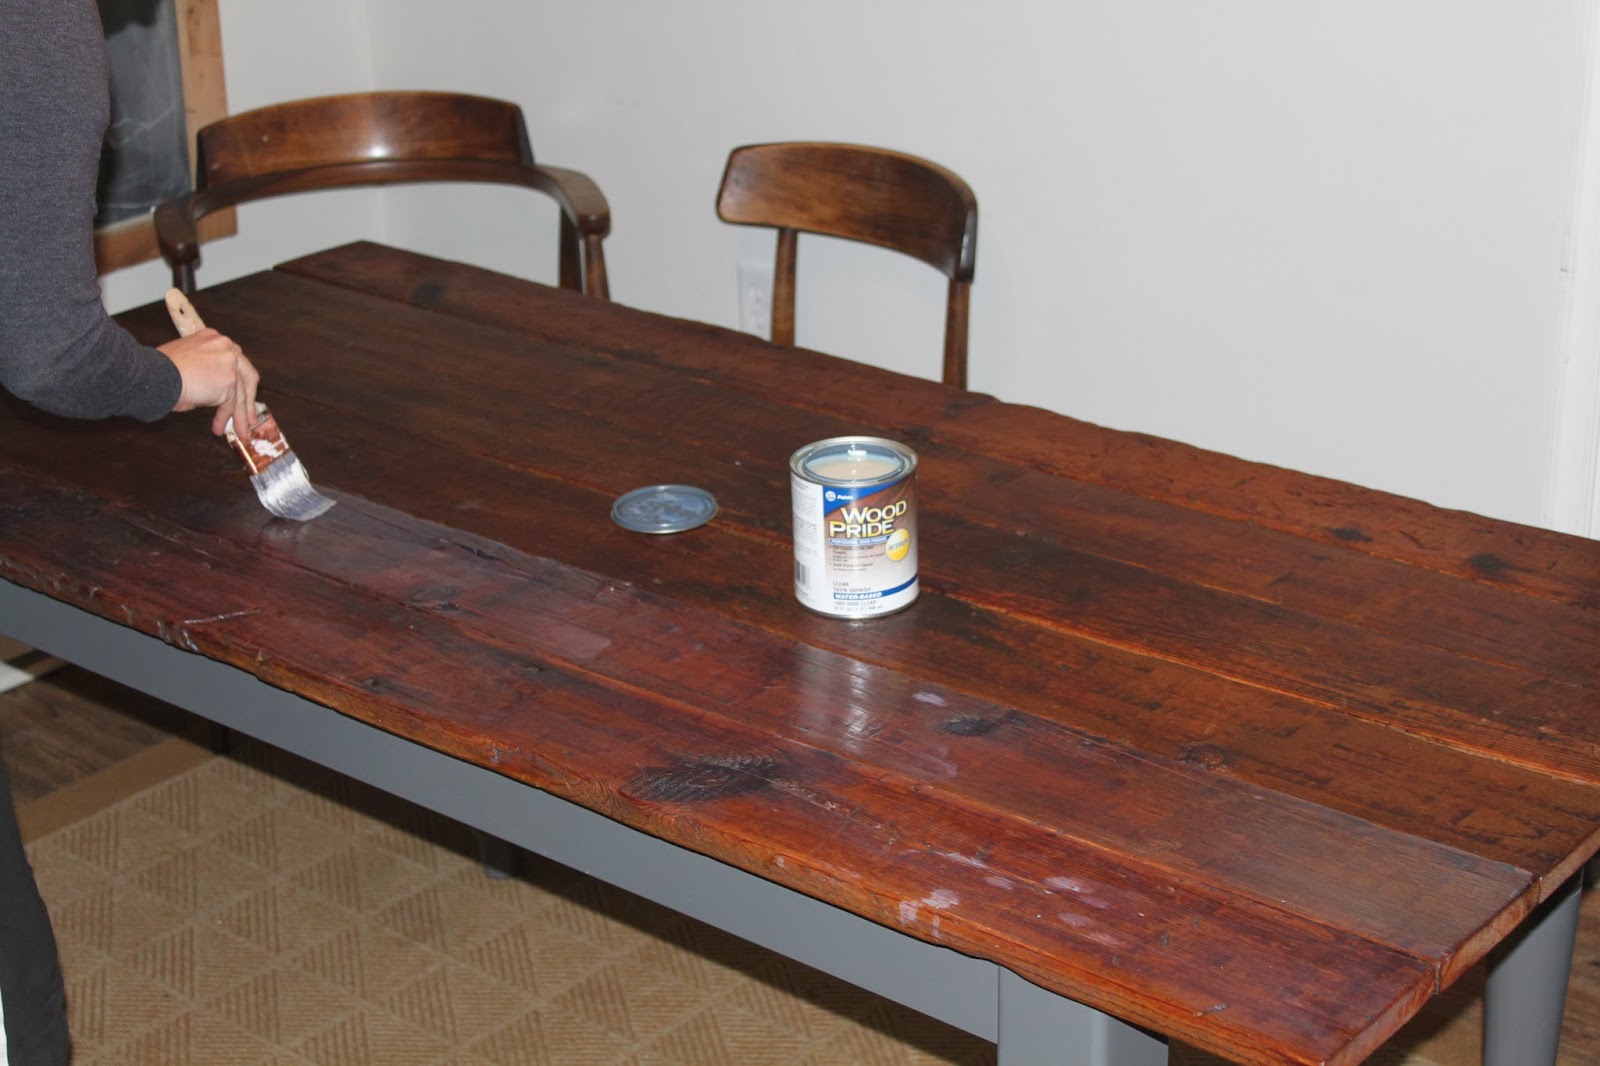
You may have noticed those whitish spots on the table. We think it was where we rubbed the table to get off some marker spots from one of the kids. Once the wood finisher dried, the spots faded away.
The poly and finisher gave the table a smooth surface that can easily be cleaned.
And this is how it all turned out.

This is what it looks like underneath because I know you were wondering.
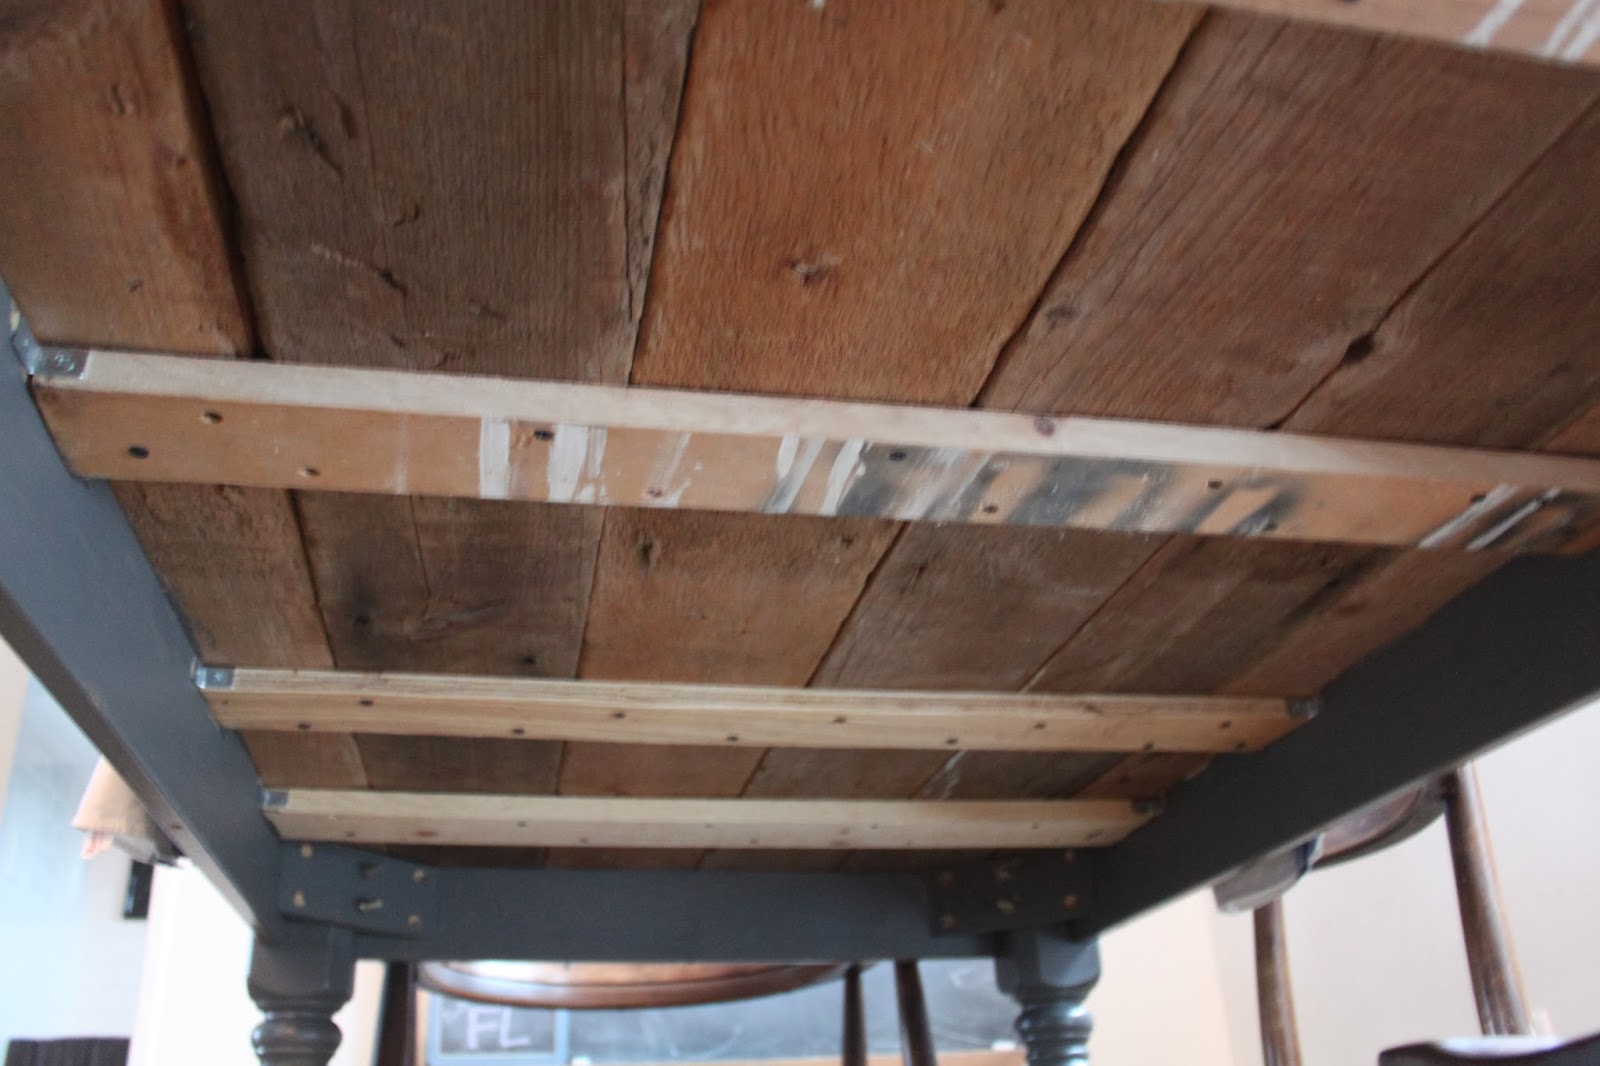
Actually, I just realized with this picture that Kat painted the inside of the base too. She is thorough!

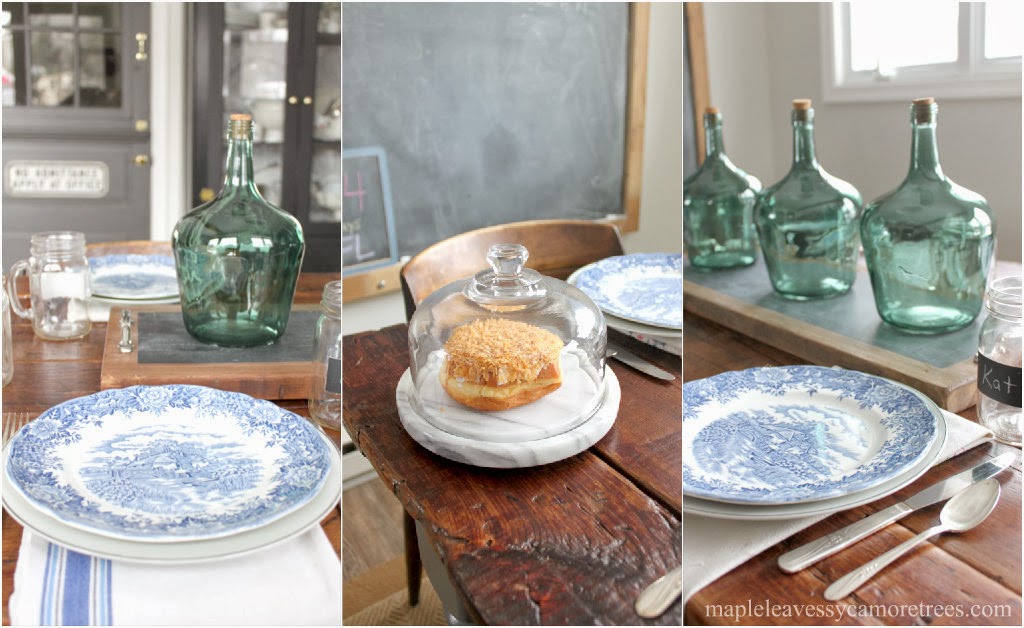
(and yes, that is a Shady Maple doughnut under that glass dome there.)
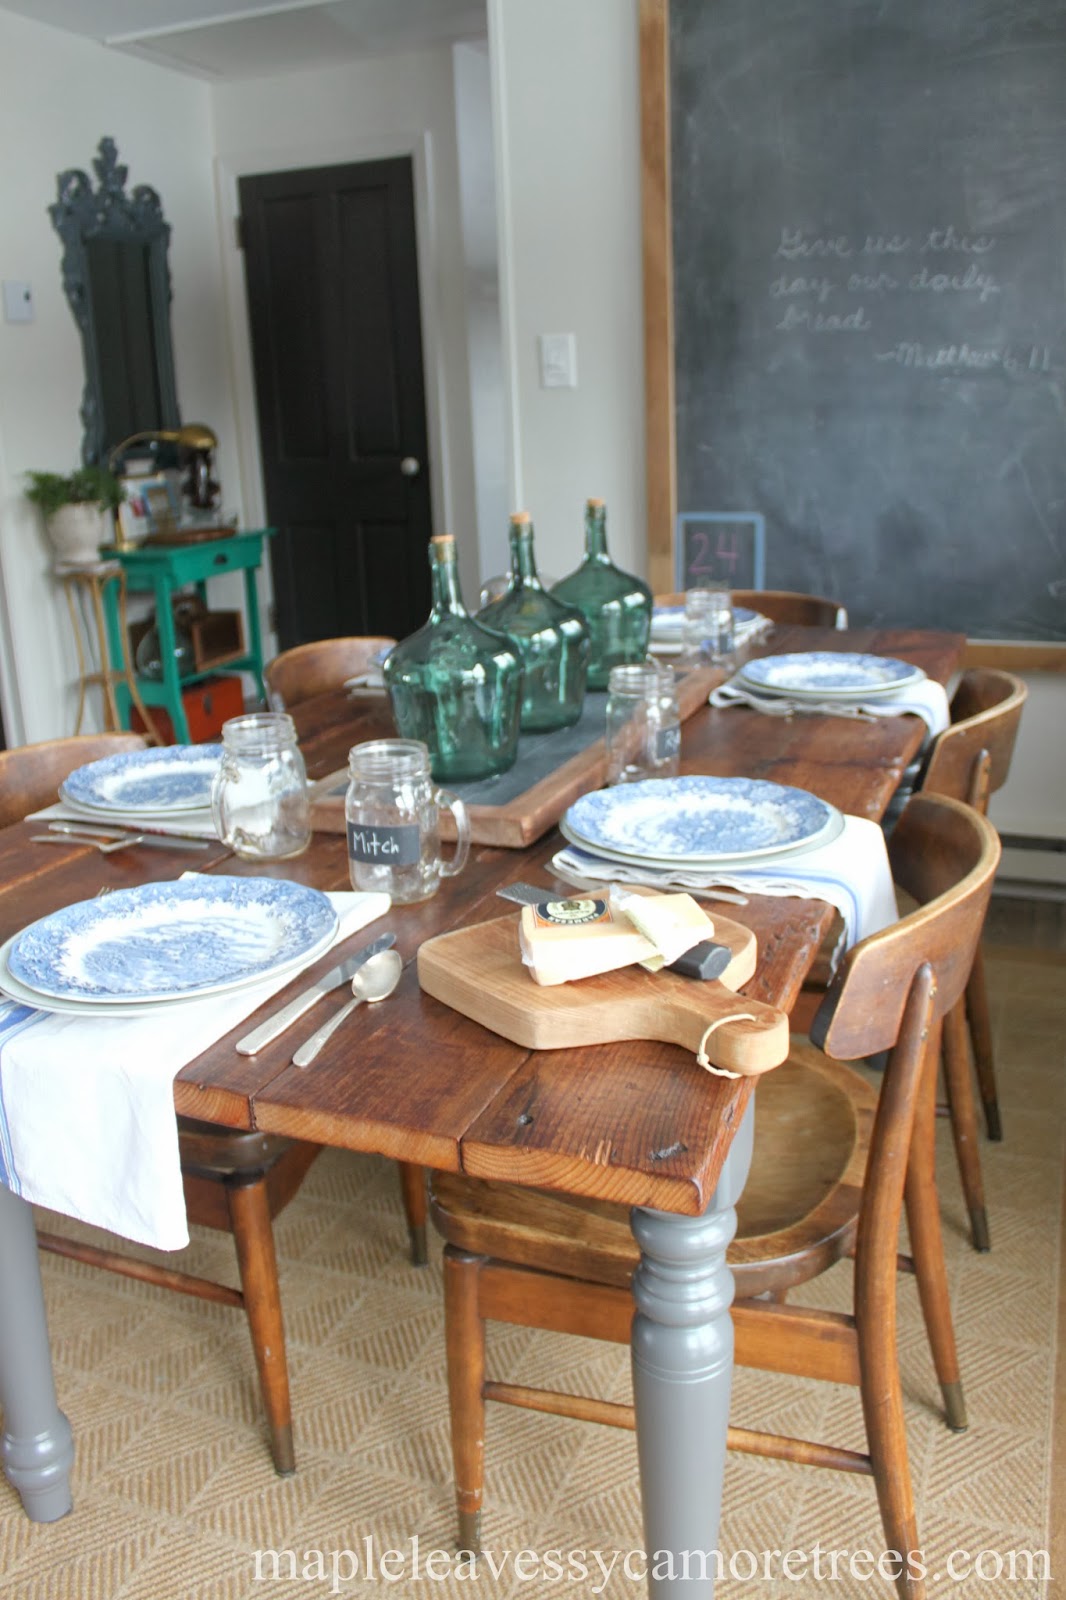
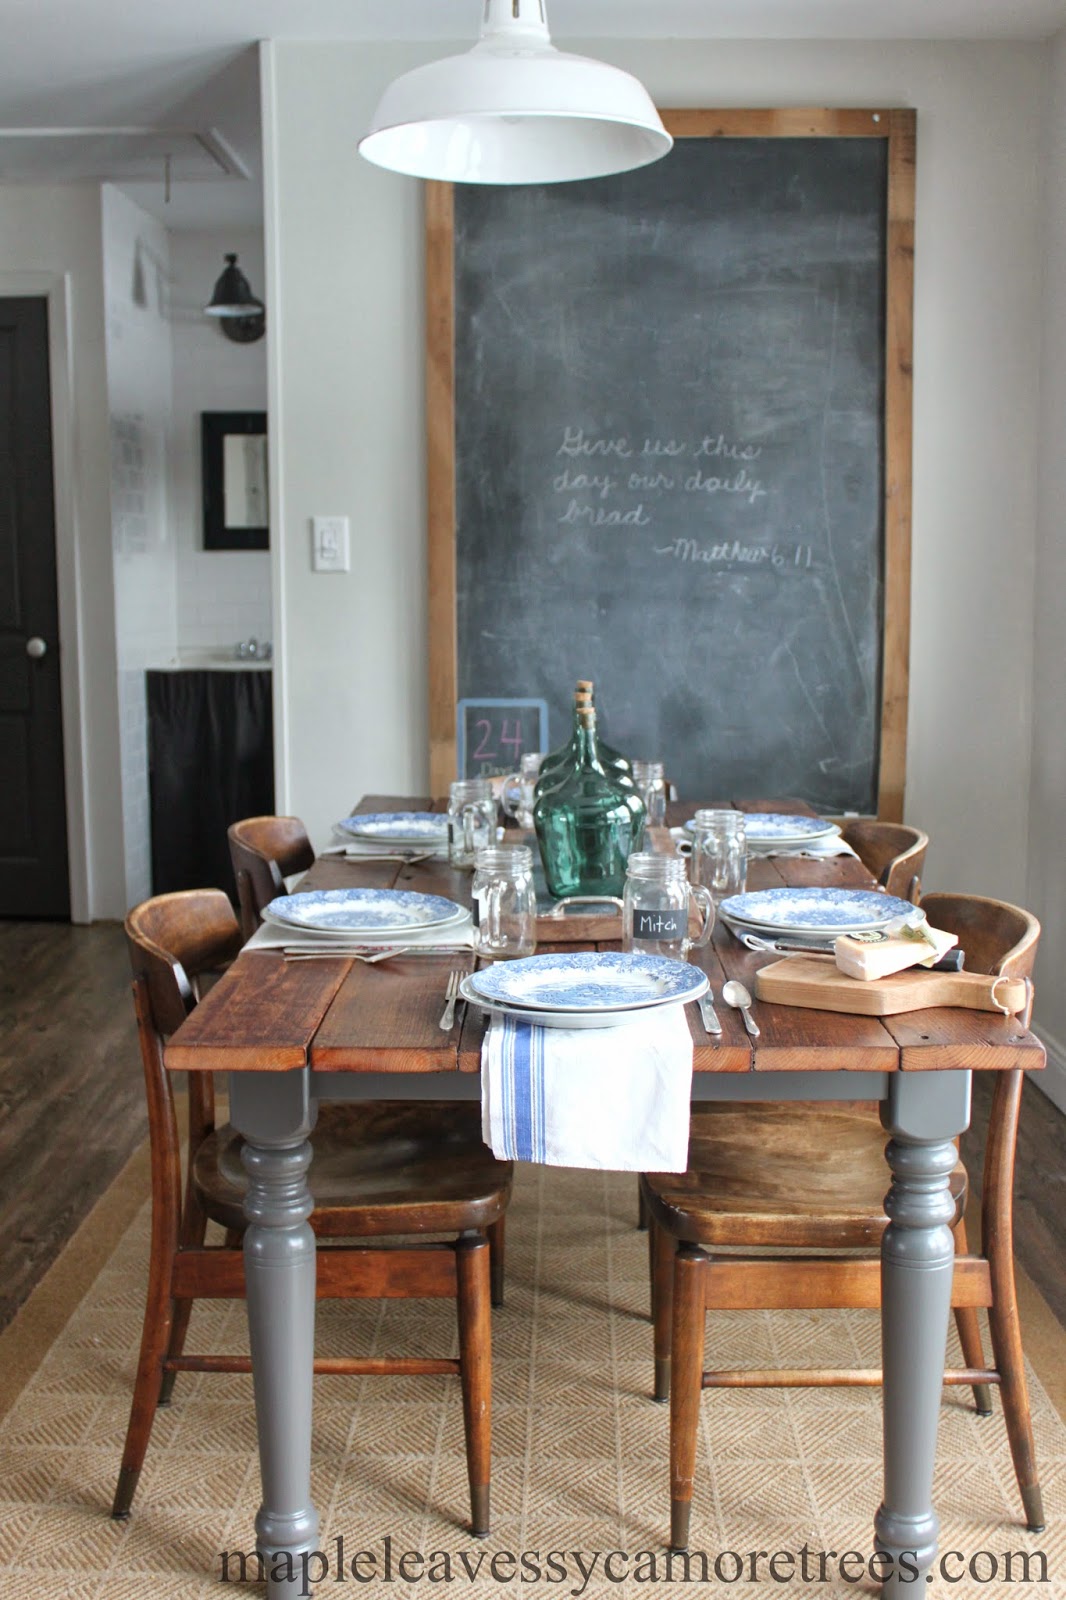
We are very happy with the result. It adds a lot of warm, rustic charm to our dining experience.
So the next time you see a request on Facebook for more lives on Candy Crush, just ignore it. Who knows, maybe it will lead to more barnwood tables.
~Mitch


